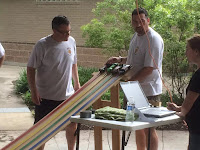
 It's his 2nd Pinewood Derby Car season, and we want to try something different this year. Surprisingly, our new strategy worked ! My son's car won the 2nd place in speed contest. 😏
 Just like to share a few tips here. Again, it may or may not work for your case, but just to inspire you to try something differently.
Let him do it
Looked back, I felt that I did more than I should've done for him lastyear. Probably OK for the first car. This year I promised myself - let
him do it, so he could learn more. It turned out worked really well. He
 had lots of good ideas. In fact, more involvement made him more responsible / accountable. For example, he did not do a super good job in sawing the front body. Later on, almost every evening after dinner, he kept sanding the front body until it was smooth and curved. Never seen such responsibility and persistence from him before.
 Biggest learning from our first car
 Wooden tracks - the biggest learning from last year. Most of the tricks & tips on YouTube are based on Aluminum tracks, which are more smooth, straight, and better quality. Therefore, all the fancy trips such as rail-riding and bent axles did not work well last year. In fact, our car was slow. We had to try something differently, at least for the wooden tracks, this year.
Working tips only - No fancy ones
 Not too much online tips for wooden race track. My son and I decided to just try out our ways. We picked the following 5 out 11 tips that we used last year.
1. Weight to the limit
This is the primary tip, usually 5 oz! The more weight, the more potential energy, then the more speed. The 2.5 oz Canopy Weight that we used last year is unreasonably expensive. We used Tungsten Putty this year: cost by half, easily shaped, lead free, but only 1 oz weight. I still needed more. Then my wife got an brilliant idea of attaching 2 one-dollar coins to the bottom of the car via a hot glue gun as shown in the picture - concentrated weight evenly distributed around the rear axle. By the way, please weight your car with some digital kitchen scale, which has good enough precision, before your bring to the contest.
 2. Polishing
Yes, we used it this year. Polished axles and wheels, just simply follow the tips on YouTube. Therefore a Truing Mandrel is still a must for wheel polishing.
3. No rail-riding or bent axles
Because of wooden race tracks, we decided not to use any fancy bent axles or rail-riding technique. They did not work last time plus very expensive. We just polished the nails and then used my hand and Phillips-head screwdriver to push the axles straight in. Don't waste your money to buy Axle Puller and Inserter.
4. Finishing
We used Minwax Polycrylic Clear Gloss Spray. With just little effort, you will get glossy finishing, great surface protection, and better aerodynamics. By adding multiple layers, this is another way to gain weight.
5. Lubricant
The common trick is to use graphite powder. Two tips I like to share: (1) put the polished wheels and the graphite powder in a Ziploc bag and shake them. You basically add a graphite coating on the wheel surface... more friction reduction. (2) add the last minute graphite powder before the race.
No comments:
Post a Comment